
Dead corners collect dust, orphaned gloves, and forgotten stuff. Every home has them, that awkward wedge behind the bathroom door, the kitchen cabinet where Tupperware lids go to die, the closet angle nobody can reach without contortions. These spots represent wasted square footage, and in homes where storage is already tight, that’s real money left on the table. Corner storage bins transform these neglected zones into functional space. They’re not glamorous, but they work, and when chosen and installed correctly, they can reclaim 15-20% more usable storage in a typical room.
Table of Contents
ToggleKey Takeaways
- Corner storage bins reclaim 15-20% more usable storage by utilizing otherwise wasted corner space, addressing the efficiency gap where corners hold less than 5% of stored items despite comprising 10-15% of room perimeter.
- Select corner storage bins based on material durability and load requirements: plastic works for lightweight items (15-25 lbs), while reinforced wire or metal bins handle heavy-duty loads exceeding 50 lbs in garages or kitchens.
- Proper installation requires precise measurements with 1/2-inch clearance, locating wall studs for secure mounting, and using toggle bolts rated for loaded weight—drywall anchors alone fail under repeated use.
- Different rooms demand specialized corner solutions: pull-out drawer systems for kitchen cabinets, rust-resistant caddies for bathrooms, and rotating carousels for closets maximize accessibility and prevent items from getting buried.
- Maximize corner bin effectiveness by choosing stackable, transparent, or open-front designs to prevent the ‘out of sight, out of mind’ problem and adding battery-powered LED lights in shadowed corners.
- Install corner storage bins at accessible heights (eye level or below for daily use, 36-42 inches for entryways) and always label contents clearly to ensure consistent family adoption and long-term organization.
Why Corner Storage Bins Are Essential for Modern Homes
Modern home design prioritizes open floor plans and minimal visual clutter, which sounds great until someone needs to store winter coats, cleaning supplies, or pantry overflow. The result: corners become dead zones while homeowners stack bins along walls and trip over overflow.
Corner storage bins address three core problems. First, they exploit geometry. A 12-inch corner bin fits into a 90-degree angle that a standard rectangular container can’t touch without blocking adjacent wall space. Second, they create vertical solutions. Stackable corner units use height in spots where horizontal expansion isn’t possible. Third, they compartmentalize. Instead of tossing miscellaneous items into a general bin, corner organizers often include dividers or tiered designs that keep categories separate.
From a spatial efficiency standpoint, corners represent roughly 10-15% of a room’s perimeter but often hold less than 5% of stored items. That’s a utilization gap. Installing corner bins, whether freestanding units, wall-mounted shelves, or pull-out drawer systems, closes that gap without requiring construction, permits, or structural changes. For renters or homeowners avoiding major renovations, corner storage offers immediate ROI in square footage reclaimed.
Types of Corner Storage Bins for Different Spaces
Kitchen and Pantry Corner Solutions
Kitchen corners are notoriously difficult. Base cabinets with blind corners waste 30-40% of their interior volume because the back half is unreachable. Lazy Susans remain the default fix, rotating trays that bring items to the front, but they don’t work for tall bottles or bulk goods. Pull-out corner drawers (also called magic corners or LeMans units) use articulated arms to swing shelves outward, exposing the full depth. These require cabinet modification and cost $150-$400 per unit, but they triple usable space.
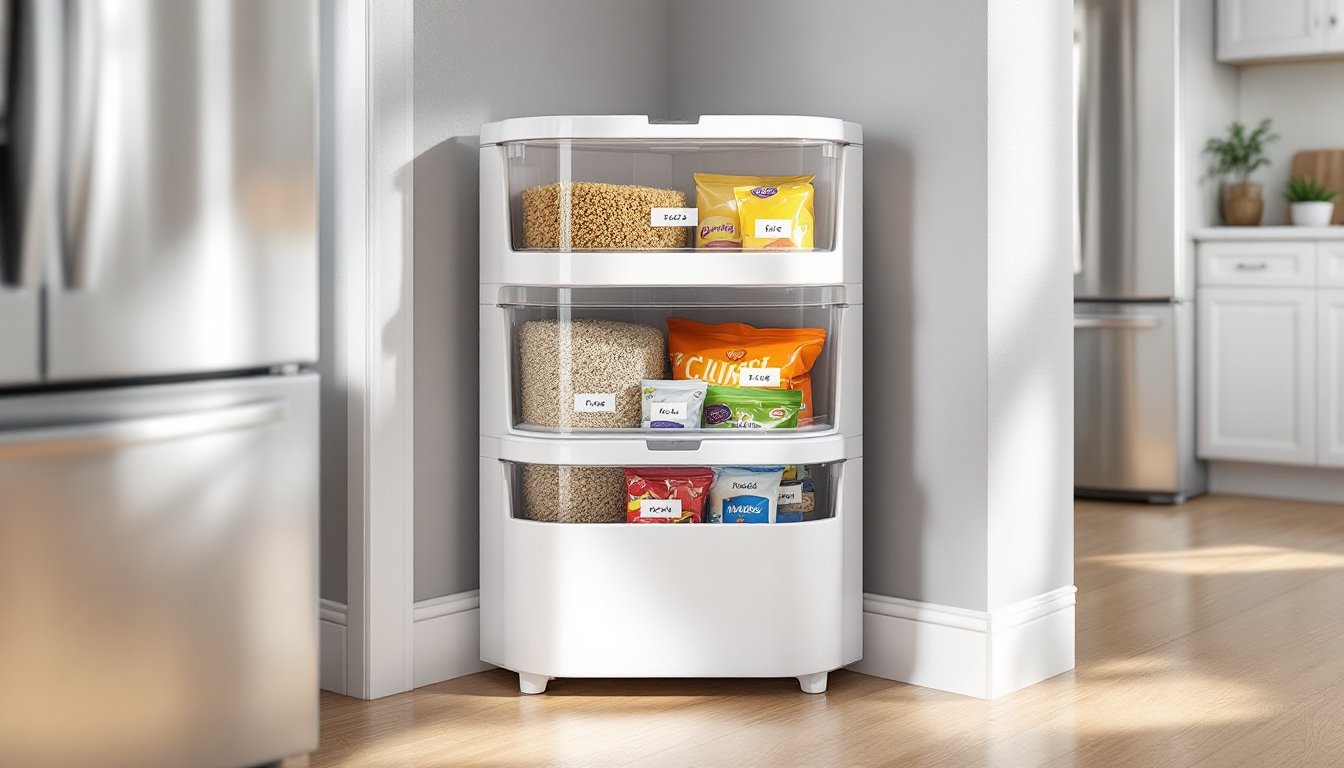
For pantries, freestanding corner bins with angled fronts fit flush against walls while maximizing interior volume. Look for units with clear plastic or wire mesh sides so contents stay visible. Stackable designs work well for dry goods, label each tier (rice, pasta, snacks) to avoid rummaging. Many manufacturers now offer corner bins with pull-out drawers built in, which prevent items from getting buried at the back.
Countertop corner storage is trickier. Tiered lazy Susans (the kind with 2-3 levels) corral spices, oils, or coffee supplies without blocking sightlines. Avoid overly decorative designs: stick with nonslip bases and rimmed edges to prevent bottles from sliding off during rotation.
Bathroom and Closet Corner Organizers
Bathroom corners often sit unused because standard shelving blocks toilet access or door swing. Corner shower caddies are the obvious choice for wet zones, look for rust-resistant stainless steel or coated wire rather than plastic, which cracks under temperature fluctuations. Tension-pole models (floor-to-ceiling) require no drilling but need textured rubber end caps to prevent slipping on tile.
Under-sink corners are black holes. Sliding corner bins on rails fit around P-traps and bring cleaning supplies forward. Measure the trap location before buying: most units are designed for center-drain sinks, and offset drains require custom solutions. Stackable corner drawers also work if vertical clearance allows, they’re ideal for toiletries, makeup, or hair tools.
Closet corners benefit from hanging corner shelves (fabric or wire) that hook onto existing rods. These add 2-4 cubic feet of storage for shoes, folded clothes, or accessories without requiring wall anchors. For walk-in closets, rotating corner carousels (similar to kitchen lazy Susans but taller) handle shoes, bags, or seasonal items. Experienced mobile home storage strategies often incorporate corner bins to offset limited built-in closet space.
Hardware matters. Ball-bearing slides outlast plastic glides, and soft-close mechanisms prevent slamming. If installing in a closet with drywall anchors, use toggle bolts rated for 50+ pounds per shelf, drywall alone won’t support loaded bins.
How to Choose the Perfect Corner Storage Bins
Start with measurements, not shopping. Measure the corner’s inside dimensions at the narrowest point, corners are rarely perfectly square due to drywall inconsistencies or baseboards. Subtract 1/2 inch from each wall dimension to account for clearance: bins that fit too snugly can’t slide in or out without scraping.
Material choice depends on load and environment. Plastic bins work for lightweight, dry goods (craft supplies, linens, toys). Look for HDPE or polypropylene, they resist cracking better than cheaper polyethylene. Wire or mesh bins provide ventilation, which matters in humid basements or pantries prone to condensation. Woven baskets (wicker, seagrass, or fabric-lined wire) suit visible storage in living areas but collect dust and aren’t cleanable.
For heavy-duty use, garage tools, canned goods, or books, choose metal or reinforced composite bins. Check the weight rating printed on the packaging. A typical plastic corner bin handles 15-25 pounds: wire units with reinforced frames can hold 50+ pounds.
Stackability matters if vertical space is available. Ensure bins have nesting tabs or lip edges to prevent toppling. Freestanding stacks above 3 feet should be anchored to the wall with furniture straps or L-brackets (especially in homes with kids or earthquake risk).
Consider access patterns. If the bin will be accessed daily (bathroom toiletries, kitchen snacks), prioritize pull-out or rotating mechanisms. For seasonal storage (holiday décor, off-season clothes), a static bin with a lid is fine. Professionals from organizing and storage fields recommend transparent lids or open-front bins to eliminate the “out of sight, out of mind” problem.
Color and finish are practical, not just aesthetic. Light-colored bins make contents easier to see in dim closets. Textured or matte finishes hide scratches better than glossy plastic. If matching existing décor, bring a photo or sample swatch to the store, whites and grays vary wildly between brands.
Creative Ways to Use Corner Storage Bins Throughout Your Home
Beyond the obvious kitchen and bathroom applications, corner bins solve niche problems most homeowners don’t anticipate.
Entryway corners become drop zones for keys, mail, gloves, and dog leashes. A two-tier corner bin with hooks on the exterior (for coats or bags) and compartments inside (for smaller items) consolidates the chaos. Mount it at 36-42 inches off the floor, high enough to stay out of vacuum range, low enough for kids to reach.
Garage corners near the overhead door are dead space. Wall-mounted corner bins (heavy-duty plastic or metal) store frequently used items, work gloves, zip ties, spray lubricant, within arm’s reach. Avoid storing anything temperature-sensitive (paint, batteries) in uninsulated garage corners during winter.
Bedroom corners behind doors are perfect for hampers or laundry sorters. Triangular hampers with lids fit tighter than round models. For kids’ rooms, corner toy bins with angled openings make cleanup easier, toys roll toward the back naturally, and kids don’t need to reach into deep boxes.
Home office corners can house vertical file bins for paperwork or charging stations with built-in cord management. A corner shelf unit with bins for office supplies (pens, sticky notes, cables) frees up desk surface. Ensure the shelf is at elbow height (approximately 24-30 inches above the desktop) to avoid constant bending.
Some creative corner storage concepts include repurposing corner space for pet feeding stations (bowls fit into low corner bins with raised edges to contain spills) or craft supply centers (tiered corner bins separate yarn, fabric, or beads by color).
In basements or utility rooms, corner bins on casters create mobile storage for seasonal gear, pool toys in summer, snow gear in winter. Choose locking casters (at least 3-inch diameter) to prevent bins from rolling on uneven concrete floors.
Installation and Placement Tips for Maximum Efficiency
Freestanding corner bins require no installation, but placement matters. Set them flush against both walls to avoid tipping. If the floor is uneven (common in older homes), use adhesive furniture pads or shims under the low side. Don’t assume corners are 90 degrees, use a framing square to check, and adjust bin angle if needed.
Wall-mounted corner bins and shelves need solid anchoring. Locate studs with a stud finder: corner studs are typically 1-1/2 inches from the corner’s inside edge (assuming standard 2×4 framing). If studs aren’t accessible, use toggle bolts or snap toggles rated for the bin’s loaded weight. Drywall anchors alone fail under dynamic loads (bins being pulled in and out repeatedly).
For shelves above 48 inches, consider whether the homeowner can safely access them. A step stool works, but if the bin will be used daily, install at eye level or below. When installing multiple shelves vertically, space them 12-16 inches apart for standard-height bins. Measure the tallest bin you plan to use, add 2 inches, and use that as the spacing.
Lighting is overlooked. Corner bins in closets or pantries are often shadowed. Install battery-powered LED puck lights or motion-sensor strips on the underside of shelves above the bin. This costs $10-$20 per light and eliminates the “flashlight in the pantry” problem.
If installing a pull-out corner bin system in a cabinet, you’re modifying cabinetry. Measure twice, drill pilot holes, and use wood screws (not drywall screws) into cabinet frames. Most pull-out systems include templates: tape them in place and mark screw holes with a center punch to prevent bit wandering. Wear safety glasses, drilling overhead in a cabinet means sawdust and wood chips fall directly into your face.
For DIYers comfortable with basic carpentry, building a custom corner bin rack isn’t complex. IKEA hacks using modular units like IVAR or LACK components can be adapted to corner configurations. Use a miter saw to cut shelves at 45-degree angles for corner joints, and reinforce with corner braces or L-brackets on the underside. Sand all cut edges to avoid splinters, and apply polyurethane or paint if the unit will be in a humid area.
Finally, label everything. Even transparent bins benefit from labels, label makers or printable adhesive labels keep family members from guessing. Place labels at eye level on the bin’s front edge, not the top, so they’re visible when bins are stacked or on high shelves.